SYSTEM SET UP IN 9 EASY STEPS
A step by step tutorial on how MRI technologists can operate the MRIaudio Sound System on a GE machine. It is easy to use and provides patient comfort during stressful scans.
1. POWER UP
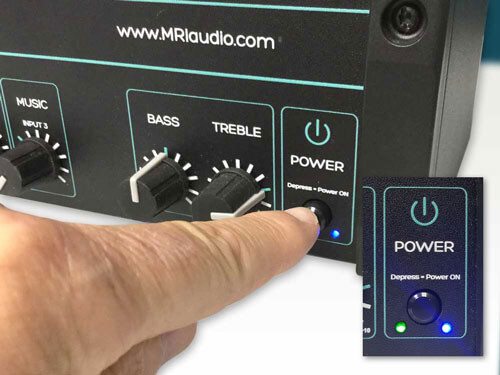
Depress the power button on the lower right of the Digital Amplifier. A green light will illuminate to indicate the system is on. The blue light will always glow whether the amplifier is on or off.
3. ADJUST iPAD VOLUME to MAX
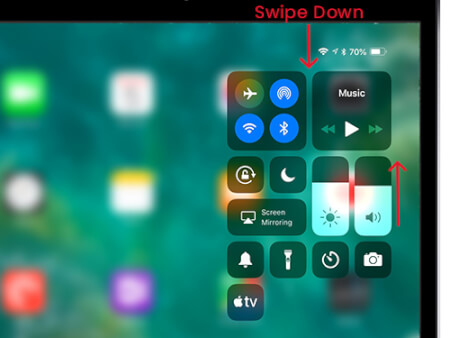
In order for the audio to work properly, the volume on the iPad must be maxed out. Slide your finger down from the top right of iPad to access volume controls. From there, slide the volume control to max. There is also access to volume control buttons on the side of the iPad. Now you’re ready to listen to your audio! Enjoy!
2. SELECT STREAMING SERVICE & PRESS PLAY
Have the patient select a streaming app, then choose their favorite music genre or podcast. Hit play.
4. CLOTH COVERS AND EAR TIPS
To prevent cross-contamination, put new cloth covers or foam ear tips on the headphones for each new patient.
5. PLACE HEADPHONES
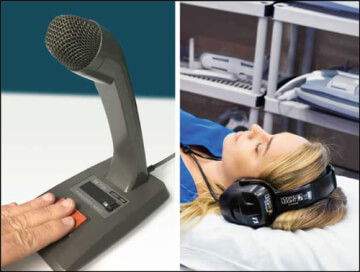
For Over-Ear Headphones: Adjust the head band for size and place onto patient. Ensure the ear cups are covering entire ear. For In-Ear Headphones: Gently insert foam tips into patient’s ears covering the entire ear canal.
6. ADJUST HEADPHONE VOLUME
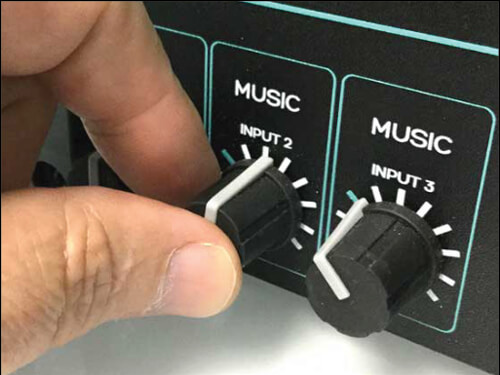
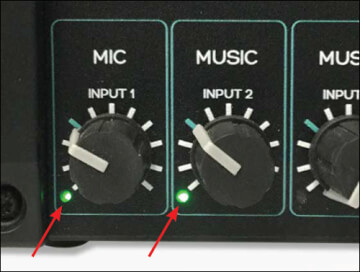
Using the MUSIC INPUT 2 knob on the Digital Amplifier, adjust the volume for the patient’s headphones.
7. COMMUNICATE WITH PATIENT
Before beginning the scan, utilize the technologist microphone, or the GE AutoVoice, to check with patient comfort. Microphone will override music when button is pressed for clear communication.
8. MIC AND AUDIO CONTROL KNOBS
The knob MIC INPUT 1 controls the technologist microphone to the patient. The knob MUSIC INPUT 2 controls the patient’s headphone volume. Both knobs have a green indicator light when in use.
9. ADJUST BOSE SPEAKER VOLUME
The technologist has the option of listening to the same audio as the patient. To adjust volume in control room, turn knob on main speaker.

